modern quilt, modern quilting, quilt stars, ohio stars quilt, variation stars quilt, true luck fabric, true luck quilt, layer cake quilt, charm squares quilt, 9 patch quilt, nine patch quilt

The Modern Stars Quilt

Finished Quilt Size: 53″ by 53″

My Modern Stars Quilt is finally complete!  I started this quilt project over a year ago!  The quilt pieces have been through two moves and two sewing machines!  I’ve lost pieces along the way and I even lost the design sheet for a few months before it magically resurfaced!  Then, when I finished the entire quilt top, I couldn’t find the quilt binding that I had pre-made and had to start over in mixing and matching!  After I finished the new binding, I found the original quilt binding in the Christmas decorations box.  Why was it in there?  I don’t know!  {I take a deep breath…} But, we’ve finally made it to the finish line together.   Here we are…

Quilt Binding Pictures, modern quilt, modern quilting, quilt stars, ohio stars quilt, variation stars quilt, true luck fabric, true luck quilt, layer cake quilt, charm squares quilt, 9 patch quilt, nine patch quilt

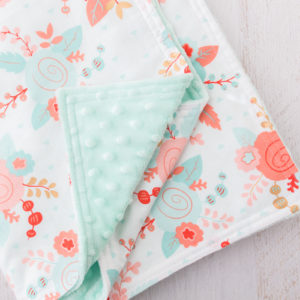
Here are some work in progress photos and there’s the binding I used for this quilt.  I couldn’t find a fabric I liked enough to bind the quilt, so I actually used the left over backing fabric to make the binding.  I had just enough fabric leftover from the backing to make the binding.  It was meant to be for this little quilt.  Love the little white flowers print.

Modern Stars Quilt, quilt binding, modern quilt, modern quilting, quilt stars, ohio stars quilt, variation stars quilt, true luck fabric, true luck quilt, layer cake quilt, charm squares quilt, 9 patch quilt, nine patch quilt

Modern Stars Quilt, quilt model, modern quilt, modern quilting, quilt stars, ohio stars quilt, variation stars quilt, true luck fabric, true luck quilt, layer cake quilt, charm squares quilt, 9 patch quilt, nine patch quilt

There’s my good little boy.  He’s a great help at holding down the quilts so they don’t slide off the rail.  Occasionally, he pops his head up to ask, “Am I doing a good job?” as well as “How many gummy bears am I getting for this?”

Modern Stars Quilt, quilt binding, modern quilt, modern quilting, quilt stars, ohio stars quilt, variation stars quilt, true luck fabric, true luck quilt, layer cake quilt, charm squares quilt, 9 patch quilt, nine patch quilt

Here’s a closer look at one of the “modern stars.”

Modern Stars Quilt, modern quilt, modern quilting, quilt stars, ohio stars quilt, variation stars quilt, true luck fabric, true luck quilt, layer cake quilt, charm squares quilt, 9 patch quilt, nine patch quiltModern Stars Quilt Model, modern quilt, modern quilting, quilt stars, ohio stars quilt, variation stars quilt, true luck fabric, true luck quilt, layer cake quilt, charm squares quilt, 9 patch quilt, nine patch quilt

This quilt pattern is now available in my Etsy shop! **2017 Update** Upon magazine publication, this quilt has now been renamed to “Aurora Borealis Quilt” and the pattern can be found on Etsy here:  Aurora Borealis Quilt Pattern

Thanks for stopping in today and letting me share my newest quilt!  Make it a beautiful day!

Susie  :)
  • Karen - Your Quilt is beautiful. I ordered the pattern. I have a Grandgal that graduated and loves shades of red and blacks..I will put white into it to…Thank you for your idea!!….I have been ill for over 2 years and now I think I have the energy to quilt again..have my flower gardens full of bulbs to watch come up now! God bless you!!May 8, 2018 – 9:34 amReplyCancel

    • Susie - Hi Karen! So lovely to hear that you are making a recovery and you can return to doing things you love again! Be sure to send me a pic of your quilt when you’re done! I’d love to see it!May 8, 2018 – 1:01 pmReplyCancel

  • Sue Potter - I love your patterns. The little guy is so cute!!July 19, 2017 – 11:57 amReplyCancel

    • Susie - Hi Sue! Yes yes! The little guy is so cute! Haha 😉 Thank you so much for taking the time to write! 🤗July 19, 2017 – 8:59 pmReplyCancel

Pyramid Pouch Photos

A few weeks ago, I made a decision to use cash more often, instead of charging everything on the card.  Although it is the most convenient thing ever to just run my card through the machine for all my purchases, I’m always really surprised at how much I had spent when the bill arrived!  I wanted to make a change in the way I spent money.  I decided that paying in cash would make me more aware of how much things cost.  Additionally, physically seeing the $20 dollar bills in my wallet disappear has made me much more thrifty and more likely to buy and spend less!  My money saving strategy appears to be working!

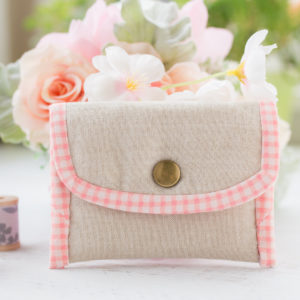
A few days into this new spending plan, coins have started piling up in my purse!  It seems I haven’t gotten use to remembering to use my coins!   My remedy?  A new coin pouch! Aren’t they cute?!

Pyramid Pouch PhotosPyramid Pouch Photos-2

Here’s the pretty insides.

Pyramid Pouch Photos-3After I made one, I thought they were so stinkin’ cute, I had to make a few more!  You can make them too!  Check out my free tutorial here!

Happy Sewing!

Susie  :)

  • Rose Mary Smith - Thank you for sharing your cute pyramid zip bag.
    The directions with photos really
    Helped me understand putting in a zipper…which is what I was originally looking for.
    The bonus was bringing me here!December 1, 2019 – 5:43 pmReplyCancel

  • Rhonda Vigness - I love everything you make! you are inspiring.July 15, 2017 – 6:06 amReplyCancel

    • Susie - Wow!!! I love receiving comments like these! Thanks for taking the time to write to me! :)July 16, 2017 – 9:18 amReplyCancel

Free Crochet Pattern Spiral Crochet Beanie, Crochet Beanie Tutorial, Crochet Hat Pattern

We’re heading out to Big Bear Lake and I’ll need a beanie to keep my head warm.  I crocheted a spiral beanie and I’m sharing the pattern with you!

This pattern is adult size, and uses front post double crochets (fpdc), double crochets (dc), and single crochets (sc).  It works in rounds to form the beanie.

I used chunky yarn (weight 5 “bulky”) and Crochet Hook Size N:

Start:  Chain 8, sl st to first ch

Round 1:  Ch 3 (counts as first dc), 15 dc into ring

Round 2:  1 fpdc in every dc (15 sts)

Round 3:  1 fpdc in fpdc from previous round below, 1 dc in next sp.  Repeat [1 fpdc, 1 dc], for a total 30 sts.

Round 4:  1 fpdc in fpdc from previous round below, 2 dc in next sp.  Repeat [1 fpdc, 2 dc] for a total of 45 sts.

Rounds 5-14:  1 fpdc in fpdc from previous round below, 3 dc in next sp.  Repeat [1 fpdc, 3 dc] for a total of 60 sts each round.

Rounds 15-16:  1 fpdc in fpdc from previous round below, 2 dc in next sp.  Repeat [1 fpdc, 2 dc] for a total of 45 sts each round.

Round 17-20:  Sc in each st for a total of 45 sts each round.  Tie off and weave in ends.  Done!

Free Crochet Pattern Spiral Crochet Beanie, Crochet Beanie Tutorial, Crochet Hat Pattern, Swirl beanie tutorial, how to crochet a beanie

Here’s what the beanie looks like halfway through.  The beautiful spiral starts to appear!

Free Crochet Pattern Spiral Crochet Beanie, Crochet Beanie Tutorial, Crochet Hat Pattern, Swirl beanie tutorial, how to crochet a beanie

Have you tried this pattern?  Let me know what you think!

  • Laura - Left handlers should place the dc in the space before thr fpdc.May 10, 2021 – 4:48 pmReplyCancel

  • MC - I use 3 patterns for the neonatal beanies I make for the NICU and wanted to try this pattern. What adaptations would I need to make to allow it to size a preemie?
    ThanksJune 15, 2020 – 11:47 amReplyCancel

    • Jane B - I just used DK and 3.5mm hook to get baby sizeNovember 17, 2020 – 10:31 pmReplyCancel

  • Renee Holt - I absolutely love your pattern. I had fun making your hat. I made mine a lime green. It looks real pretty.February 5, 2020 – 1:02 pmReplyCancel

  • Maya - I tried it and it was super easy. I posted it on my Instagram and would like to tag you. Do you have an Instagram account?January 31, 2020 – 10:57 amReplyCancel

    • Susie - Hi Maya! Happy to hear that you liked the pattern! My instagram is @loganberryhandmade – thank you! :)February 11, 2020 – 4:45 pmReplyCancel

  • Geraldine - I loved this pattern. I used homespun by Lion Brand. After doing two rounds of the 3 double crochets with the 9mm hook I switched to a 6 mm, did 12 rows with that and finished with three rounds of single crochet. I made it for my adult daughter but love it so much I will make one for myself and the other daughter also. Thank you so much for this.January 16, 2020 – 2:08 pmReplyCancel

  • linda - Does any one know if you are able to change colors ( I wanted to do red/christmas green would it work?December 19, 2019 – 1:59 pmReplyCancel

    • Tim - You could change colors anywhere you like. Perhaps every other row, or every other cluster… larger color bands could be 2 or 3 rows etc.

      I’ve made perhaps 10 of these and liked each one, in fact I’m making one right now with Malbrigo’s Mecha Pocion.

      Have fun! :)February 8, 2021 – 6:09 pmReplyCancel

    • Aslinn - It does! I made one with red and blue!December 16, 2020 – 4:54 pmReplyCancel

  • Suzi - I started this hat. It looks like the picture and swirls nicely.November 7, 2019 – 4:42 pmReplyCancel

  • Juliana - Can anyone tell me if this pattern will be using only 1 skein (100g) Bulky yarn? Thank youOctober 31, 2019 – 9:16 amReplyCancel

    • Susie - Hi Juliana, yes, 1 skein is enough to make this beanie 😉October 31, 2019 – 12:44 pmReplyCancel

  • Nancy - Do you work this in continuous rounds (like amigurumi) or join each round with a slip stitch then chain 3 for the first fpdc in each round? I’m just thinking that doing a chain 3 for the first fpdc would leave a gap in the spiral(one arm of the spiral being flat rather than raised) but continuous rounds might leave the last 3 rounds of sc looking less clean and straight. Interested to hear how you do it. Thanks.October 31, 2019 – 12:12 amReplyCancel

    • Emily Cherry - I just joined each row with a slip stitch, and then chained one to raise to the next row. After that, I did the FPDC, and it seems to be turning out fine; I’m making my third one in a month! Good luck, however you choose to do it. I’m sure it will be lovely! ❤️October 29, 2020 – 5:50 pmReplyCancel

  • Victoria Ridge - I used this pattern as the base for my girls wigs for Halloween a few years back. They came out perfect and my girls wore them for weeks after Halloween lol. Thank you!!
    September 16, 2019 – 6:29 pmReplyCancel

  • Ann - Thank you very much for the pattern…I love it just finished and will definable make another oneSeptember 5, 2019 – 10:57 pmReplyCancel

  • Virginia wilson - Beautiful patternAugust 25, 2019 – 6:28 amReplyCancel

  • Laurie - I made one hat and onto the second. Neither hat is swirling. What am I doing wrong?August 15, 2019 – 8:15 pmReplyCancel

    • Vix - Make sure you’re doing your double crochets right after the fpdc, in the space next to it. I had to pull mine a couple of times. And then reach for the next fpdc. That naturally makes everything bend slightly.

      It’s a great hat! The pattern is quick and I’m happy I’m done so I can wear it and be warm on my east coast vacation next month.

      Thank you for the pattern!September 15, 2019 – 1:31 pmReplyCancel

    • C. HillMy - My first didn’t swirl either; then I fugured it out. You need to be sure to make ALL the stitches following each FPDC in the leftmost hole. Once I placed them right up against the FPDCs the swirl began.September 9, 2019 – 3:32 amReplyCancel

  • Cheryl - After reading all the comments I set to tonight to make this lovely beanie for a child. Using 8 ply yarn and a 5.5mm hook I produced a beanie to fit a 5 to 8 y.o. Just love it, Susie, thank you!July 26, 2019 – 4:45 amReplyCancel

  • Pratima nag - Yes I have made a hat for my grand son of 14 yrs it is beautiful thanks . God bless uJuly 11, 2019 – 9:43 pmReplyCancel

  • Lolly - Love this hat! Anyone know how to make child or baby size? Would a G or H hook be used to make hat smaller?April 30, 2019 – 6:01 amReplyCancel

  • Lynn - Can you tell me what the yarn color is called? Thank you. Love this color green!March 27, 2019 – 3:04 pmReplyCancel

    • Susie - It is eucalytus green! Chunky Yarn by Bernat. :)March 29, 2019 – 1:35 pmReplyCancel

  • Carole - ARGHHHH~ I goofed. I just grabbed my new N hook and did NOT read all the comments first. I got way down to row 12 before I realized my hat was JUMBO sized. Rip it! Read the comments and saw you used a 9 mm. Found my old Boye hook a 9 mm and began again. It is fine now. Love the pattern in chunky. Thanks.February 20, 2019 – 9:18 amReplyCancel

  • Bette - Just got your pattern, looks great. I am thinking of trying double strands of regular yarn … and also continuing round 4 ( 2 DC instead of 3 DC) to make hat in children size..
    Hope this works. I am a fly by the seat of my pants knitter/crocheter.. I make about 700 hats a year for needy children. 2 yrs in a row I made 943…. but that probably caused my hip replacement ( too much sitting lol). I like simple patterns that I can crank out quickly. I do add pompoms, or flowers/bows/ butterflies for the girls ,. Thanks for this pattern. BetteFebruary 13, 2019 – 6:28 amReplyCancel

  • Temple - I am attempting this pattern after ripping out the one I started I found this pattern – much nicer pattern – so excited I stumbled upon it. I wanted to purchase patterns but alas I don’t really have the funds so very very happy I found this patterned one. Thank You soooo much.

    I have a question though – what is the circumference when finished? Will it fit a 21 1/2 circumference? I’m hoping it’s snug so doesn’t slide around.January 22, 2019 – 2:12 pmReplyCancel

  • Judith - Loved all the comments , very informative now I’m going to start mine! Thanks for this pattern!
    Do you have a star stitch hat pattern?January 7, 2019 – 6:11 amReplyCancel

    • Temple - Hi Judith
      I’m just starting mine with a 9.00mm.
      Weird, I have two hooks that say they are an N, same brand Boye, but saw that Susie used a 9 (in the comments below) so I’m going to use this one and see what happens. My yarn says its super bulky but looks the same as a bulky yarn I have and I was actually using a H hook on the previous pattern I started but when I found this one I ripped it out :-D.
      Maybe you can let me know, if you beat me finishing it, what the circumference is of yours.January 22, 2019 – 2:18 pmReplyCancel

  • Teresa - Can this hat be made in worsened weight yarn yoo? It is a beautiful pattern tooDecember 16, 2018 – 7:17 amReplyCancel

  • AJ - I made a few of these for gifts last year. Everyone loved them. So glad I found the pattern againDecember 12, 2018 – 4:32 pmReplyCancel

    • Susie - Oh this makes me so happy to hear! Glad you enjoyed the pattern! Happy holidays! :)December 14, 2018 – 4:21 pmReplyCancel

  • Mercy Fernandes - Hi Susie,

    Thanks for sharing the free Crochet Spiral Beanie pattern. This is the first time I made a spiral beanie, and it turned out beautiful. I ran out of yarn after five rounds, so just added another color, and it still looks very pretty.
    Have a blessed Thanksgiving!

    MercyNovember 21, 2018 – 7:19 pmReplyCancel

    • Susie - Hi Mercy, I’m happy you enjoyed the pattern! Thanks for visiting my website! Happy Thanksgiving to you too! 💖November 23, 2018 – 4:03 amReplyCancel

  • Suzanne R - Thank you for this! I’ve been looking for hat patterns for the shelter that had a little more style. I had to start 3 times before I figured out what I was doing wrong- duh. :0) Two things that might help people: be sure to fpdc in previous fpdc, NOT in the dc that went in the space. Also, for the dc in the space, do them in the space right after the fpdc. Great pattern, and simple once it is clear.August 25, 2018 – 8:03 amReplyCancel

    • Melissa Vierra - You rock Suzanne! 😉 Third time really is the charm, third time reading comments LOLJanuary 23, 2020 – 10:47 pmReplyCancel

    • becky thackston - oh thank you for this. I was doing the DC in the middle of the previous row DC and it wasn’t looking right. I wandered if it needed to be directly in the space after the FPDCDecember 22, 2018 – 12:22 pmReplyCancel

    • Susie - Hi Suzanne, thank you so much for adding the additional tips! Hope everyone finds them helpful too!!August 29, 2018 – 11:51 amReplyCancel

  • Sonya - Do you have a matching pattern for a scarf?July 26, 2018 – 8:03 amReplyCancel

    • Susie - Hi Sonya, no matching scarf but that is such a great idea for my to-do list! 😉July 26, 2018 – 9:33 amReplyCancel

  • tj kollis - Thank you for such a beautiful and easy pattern! Instead of letting my excess yarn waste away, decided to make beanies for the homeless and cancer patients, and this pattern works…tj kollisJuly 22, 2018 – 1:57 pmReplyCancel

  • Pam - This hat is just too cute, sofistiated and adorable for any age.
    Perfect for my oldest grand daughter and I to make during our special time. We both prefer crochet over knitting but she just started working on her first knitted hat. Yours is going to be so much more fun and we want to make some for donating to a school in KY and help them save the music and art department this year. They get to keep all the monies they collect at the fall carnival!July 3, 2018 – 11:41 amReplyCancel

    • Susie - Hi Pam! So fun! Best of luck in the hat-making and fundraising!!!July 3, 2018 – 11:57 amReplyCancel

  • Pat Kydd - I finally figured it out! Yay me! I can’t believe how easy this pattern is (once you know what you are doing!)I love, love, love this pattern. Now we need a a scarf to match!May 15, 2018 – 12:46 pmReplyCancel

    • Susie - I’m happy to hear it worked out for you! Do share photos of the hat and scarf when you’re done! 😉May 17, 2018 – 3:10 pmReplyCancel

  • Pat Kydd - I absolutely love the looks of this beanie! I am novice, left-handed and am having trouble understanding the pattern. Is there a tutorial or video showing how to crochet this hat? I’ve been working on this for several hours and my husband has begun to think that I’ve turned into a frog cuz I “rip-it so much!”May 14, 2018 – 7:45 pmReplyCancel

  • Martha - I have made quite a few of these. I love the pattern . Easy to make and fast. Made them for my daughter’s friends. They all like them. Thanks for sharing your pattern.May 9, 2018 – 8:48 amReplyCancel

    • Susie - Hi Martha! Happy to hear you enjoyed the pattern! 🤗✨May 9, 2018 – 11:11 amReplyCancel

  • Josephine woods - Beautiful hatMarch 6, 2018 – 12:40 pmReplyCancel

  • Chico Gramma - my son loves your spiral hat pattern. He’s been wearing his for over a year now and requested another one:) His friend asked my to make him one also. We all thank you for your very clever pattern.:)February 7, 2018 – 5:15 pmReplyCancel

  • Pa - This is the best pattern..my daughter was so happy..January 17, 2018 – 10:16 amReplyCancel

  • Cheryl Thompson - Susie, I just love this pattern. It works up so quickly and looks fabulous. I made them for Christmas gifts this year. They were a big hit!January 2, 2018 – 11:26 amReplyCancel

    • Susie - Cheryl, I’m so glad to hear it! Thanks for visiting my blog and using my pattern! Happy New Year!!January 2, 2018 – 7:58 pmReplyCancel

      • Oyu - Hi Susie. I looove the hat and the pattern is very pretty. I made one fir my 14 ms cherub. I’m new to crocheting and somewhere I made a mistake. My spiral didn’t turn out spiral, instead; just straight down. Where am I making a mistake? Thank you and when I master the hat, I’ll post a pic my cherub is wearing the hat. ❤️❤️
        Cherb’s mommy, OyuMarch 6, 2018 – 12:48 pmReplyCancel

        • Zoya - It sounds like you’re putting your stitches in the wrong place. Look at her first picture… The extra stitches go right after the fpdc. And they go into the entire space, not just the stitch. Also this hat is for an adult so if you’re making this for a toddler, it’s going to be too big unless you use a thinner yarn and a smaller hook. Hope it works out for you.June 11, 2018 – 11:27 amReplyCancel

        • Zoya - Make sure you’re putting the increase stitches in the same SPACE, NOT THE STITCH. I made that mistake the first time too. I know when you get to 1 FPDC a and 3 stitches, it seems like a lot of space between the two, but it works out and your hat will be wonderful. 😋June 11, 2018 – 10:21 amReplyCancel

  • Abigail Garrison - Love this hat. I am making my second one for little girls.
    My daughter is 2 I am using size 4 regular thickness yarn. I followed the pattern except I added a couple more rows in the middle.
    So size 4 yarn makes a toddler size spiral hat!
    ThanksDecember 23, 2017 – 10:54 pmReplyCancel

  • Bonnie Morris - Thanks for the pattern. Just got done making it. Wish there was a pattern to match this for a scarf and boot cuffs. Want to try and figure something out for a Christmas gift set for my DIL.November 9, 2017 – 9:10 pmReplyCancel

  • Angela - Loved it and am currently making several for the Cancer center my daddy is receiving treatments at.February 15, 2017 – 11:03 amReplyCancel

    • sugar Lee - I’m doing them for my daughter’s cancer patients. It seems a little thick. Are you using a thinner yarn and smaller hook?July 15, 2018 – 2:09 pmReplyCancel

    • Lucy - What a lovely thing to do. I wish your Daddy all the best. XSeptember 29, 2017 – 3:14 pmReplyCancel

  • Whitney - I want to do this pattern but I have size 4 yarn, will it still work out okay? Has anybody used smaller yarn? If so what size hook; do I use what is suggested on the yarn (which is 5.5mm)?December 13, 2016 – 6:57 amReplyCancel

    • Lucy - Have made several with worsted weight 4 and size i hook people love themFebruary 6, 2018 – 2:10 pmReplyCancel

      • Kim - Lucy did you add any extra stitches to rnd 1 using 4 weight. I am making chemo hats & using Caron Simply Soft.May 9, 2018 – 4:53 amReplyCancel

    • Anonymous - You could always use 2 stands of your 4 ply yarnAugust 8, 2017 – 2:53 amReplyCancel

    • Lea - Hi Whitney or Susie,

      Have either of you tried making this hat with size 4 yarn and adding a couple extra DC in the first round? I’m just wondering if 17 DC in the first round were enough to make it fit an adults head. I’m just starting this hat tonight and am a fairly new crocheter so I’m worried that it won’t be until I’m halfway done before I’ll be able to tell if it will fit my head properly or not.December 31, 2016 – 8:54 pmReplyCancel

    • Susie - Hi Whitney, this pattern for adult size only works with chunky yarn. If you try lighter weight yarn, the finished size will be much smaller. If you still want to use size 4 yarn, try adding a couple more dc into Round 1. That should make the hat bigger. Let me know if that works out for you! -Susie :)December 13, 2016 – 2:20 pmReplyCancel

  • Sari - Hi, thanks for sharing this pattern! Just wonder, if I want to make this hat for baby, how many chain should I start with?
    Thanks again :)December 13, 2016 – 12:56 amReplyCancel

    • Susie - Hi Sari, Try using much smaller yarn (light weight baby yarn) but same pattern here. That should reduce the size significantly. See if that works. If still too big, reduce by 1 dc in Round 1. Let me know how that turns out! -Susie :)December 13, 2016 – 2:18 pmReplyCancel

  • Bevy - Hi. I’m struggling. When I start this hat, I end up with a large hole in the centre. I’ve tried it with 3 different yarns, and the 9.00 mm hook…. Anyone else having this? Is it me?November 21, 2016 – 4:33 pmReplyCancel

    • Naomi - Yes I have a large hole also and the N hook seems too large. I’m trying a KITCH. I’m new to crochetFebruary 22, 2017 – 7:33 pmReplyCancel

      • Kari - I started with magic circle after trying four different amounts. Closed up beautifully!January 8, 2018 – 6:06 amReplyCancel

    • Sherry - You can close hole after the hat is done. Just make needle with yarn and sew into the rip round. Pull tight and tie offJanuary 12, 2017 – 8:45 amReplyCancel

    • Susie - Hi Bevy, perhaps you should try starting with a magic ring instead? Then, continue to Round 1 instructions. Let me know if that works out better for you. -Susie ;-)November 21, 2016 – 8:37 pmReplyCancel

  • Chaya - Hi Susie,

    I’m using super bulky yarn for this project. Do you have suggested modifications to the pattern if you’re using super bulky? Thanks!November 18, 2016 – 8:03 amReplyCancel

    • Susie - Hi Chaya, I would try modifying Round 1 by only making 14 dc’s into the ring, instead of 15. Then follow the rest of the pattern, knowing that your beanie will have less sts at the end of every round. Let me know if that works out. I’m so interested in seeing the beanie made with super bulky yarn! I’ll bet it will look gorgeous! -Susie ;-)November 18, 2016 – 8:30 amReplyCancel

  • Doom - Might be a silly question, but do you use UK or US terminology?November 18, 2016 – 1:36 amReplyCancel

    • Susie - Not a silly question at all! I am only familiar with US crochet terminology. Happy to answer any more questions you may have! -Susie ;-)November 18, 2016 – 7:22 amReplyCancel

  • Echo - This is beautiful, and I’m always looking for lovely textured stitches. Thank you!November 15, 2016 – 7:28 pmReplyCancel

  • Carmelle - Hi Susie, I just finished the beanie with a 9.00 mm hook. It looks great but I had to do less rows. I chose to do the reverse single crochet to finish it off and am happy about it. Thank you !November 14, 2016 – 10:55 amReplyCancel

    • Susie - Happy to hear! Reverse sc is a nice touch for finishing! ;-)November 14, 2016 – 6:23 pmReplyCancel

  • Carmelle - Hello. I have the required yarn for the Crochet Spiral Beanie but I would like to make sure the crochet hook to use is “N” 10.0 mm instead of “J” 6.0 mm written on the label ? Thank you in advance for your answer.November 10, 2016 – 7:16 amReplyCancel

    • Susie - Hi Carmelle, thanks for writing! Yes, I used crochet hook size N for this chunky weight yarn. I think Hook size J would be too small and too tight for the beanie. -Susie :)November 10, 2016 – 7:45 amReplyCancel

  • Jen - I’ve just finished round 9, and it’s very curly and ruffly around the edge. Will it flatten out later, or am I doing something wrong? Thanks for your help!November 1, 2016 – 6:19 pmReplyCancel

    • Susie - Hi Jen, you’re on the right track! It’s ruffly at first but as you keep going in the next few rows, you’ll start to see the dome shape! Let me know how it turns out! -Susie :)November 2, 2016 – 10:40 amReplyCancel

      • Jen - Got it! I was doing the “3 DC in next sp” wrong. Need to use a smaller hook, but I figured out what I needed to fix! Thanks for the great pattern!November 4, 2016 – 8:57 pmReplyCancel

        • Susie - Hooray! I’m glad it worked out and you enjoyed it! Happy crafting! -Susie :)November 5, 2016 – 5:31 pmReplyCancel

  • Val - My bulky yarn is a “5” and calls for a 6mm hook….which is a K, what size is the N you call for? I’m afraid it will be too big and make my hat too loose?
    I’m excited to get started on this, I have never tried the spiral before! Thanks for sharing!!!
    ValOctober 20, 2016 – 8:34 pmReplyCancel

    • Susie - Hi Val, my N size crochet hook is a 9mm hook. My yarn is pretty chunky! You might be able to adjust the size in the beginning round. Add another chain and double crochet in the beginning and then follow the same pattern that follows so that your hat won’t be too small. Let me know how it turns out! -Susie :)October 24, 2016 – 9:43 amReplyCancel

      • Temple - It’s interesting that I have an N hook that says it’s a 9.00mm and an N that says it’s 10.00mm same brand too (Boye) – weird huh? So I’m glad I went reading comments and discovered that you used and 9.00mm because I’m concerned about size.
        That’s the reason I went looking at the comments to see if anyone posted the measurement of the circumference. My head measures 21 1/2 inches.January 22, 2019 – 2:07 pmReplyCancel

  • Nikki - I am in love with this hat, down side is i am new to crocheting and for some reason i dont feel as if its looking right. i am on round 5 and see no design, any tips as to what i might be doing wrongOctober 18, 2016 – 10:04 amReplyCancel

    • Susie - Hi Nikki! Round 5 may be too early to see the spiral pattern just yet. At first it will just look like a wagon wheel. The actual curved spiral begins to show as the beanie takes shape! Keep going! -Susie :)October 19, 2016 – 3:56 pmReplyCancel

  • Corin - I love this hat, cannot wait to try the pattern :)October 17, 2016 – 12:31 pmReplyCancel

    • Susie - Hi Corin, glad you like it. Hope yours turns out beautifully! -Susie :)October 24, 2016 – 9:44 amReplyCancel

  • Jancie's stiches. - May be a silly question but I just want to double check:) do I join with a slip stich at the end of each round? Thank you so much for the beautiful pattern:) I’m making one each for my three little girls! 😍😘October 5, 2016 – 2:44 amReplyCancel

    • Susie - Hi Jancie! No slip stitch. You just keep going in rounds until the very end! I hope your girls love the beanie! Thanks for writing! 😁✨October 6, 2016 – 7:32 amReplyCancel

      • Jancie's stiches - Thank you! Another question, I am just using a smaller yarn with the called for hook to see what size I would get. It’s a nice small size but I would like to adjust from here. Do you have a system for changing the size of this hat? It’s such a unique pattern to me, I am not sure how to change it:) thank you!October 12, 2016 – 10:19 amReplyCancel

        • Susie - I would adjust from “Round 1: Ch 3 (counts as first dc), 15 dc into ring.” Experiment with 16 dc or 17 dc into ring, and all else is same in the pattern. See how much larger your finished beanie size will get with that one extra dc. Let me know how it turns out!!! -Susie :)October 12, 2016 – 10:59 amReplyCancel

  • Monica - Thanks for sharing your pattern. I’ve made a few beanies for myself but this is the first one i’ve actually worn. Very easy to follow and it looks gorgeous!July 10, 2016 – 5:10 amReplyCancel

    • Susie - I’m so glad you enjoyed the pattern and that you are actually wearing the beanie too! -Susie :)July 14, 2016 – 1:43 pmReplyCancel

  • Deepa - Thanks for the pattern, it was very helpful. Such a very good tutorial.April 25, 2016 – 4:37 amReplyCancel

    • Susie - I’m glad you enjoyed it, Deepa! :)April 28, 2016 – 10:35 amReplyCancel

      • Anonymous - I want to make 1 for myself and my granddaughter. So im going to keep practicing until I get it.February 18, 2018 – 10:23 pmReplyCancel